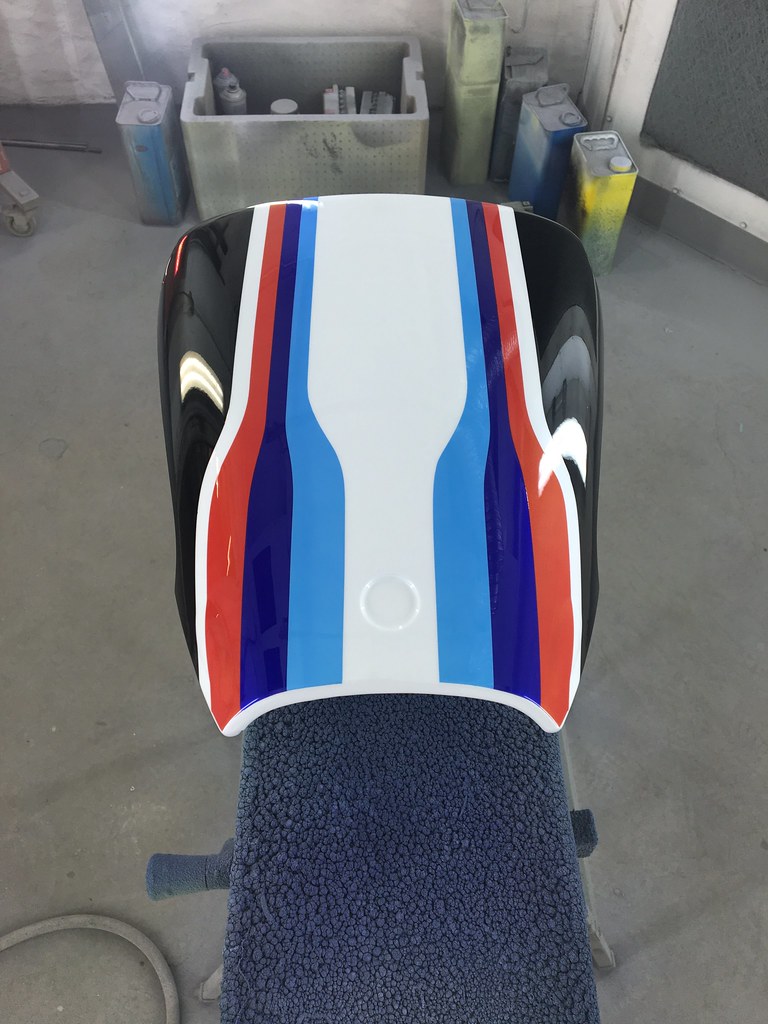
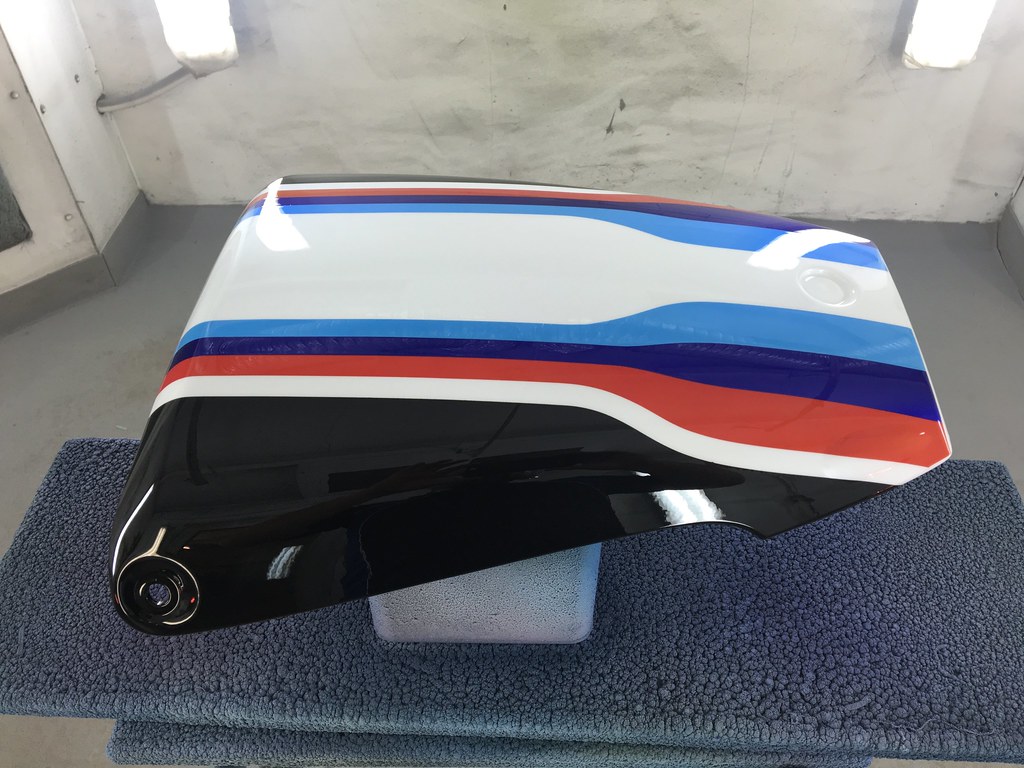
R1100S Repaint + Refresh

As it says; what you've done to your bike and how it helped make it better.

Moderators: Gromit, Paul, slparry

User avatar
Tunneruk
Posts: 38
Joined: Sun May 17, 2015 10:09 am
Location: Maidstone
Contact:

R1100S Repaint + Refresh

Postby Tunneruk » Mon Jun 20, 2016 5:12 pm

I bought my R11S a couple of months ago, despite it being a 99 with 50k on the clock it's a really clean bike with minimal corrosion. It seems to have been very well looked after.

It's fitted with Lazer cans (Standard cat) and an MRA adjustable smoked screen. I whipped the Top Box off as soon as I got the bike and fitted longer brake lines to allow the clip ons to be fitted above the yoke.

I do like the bike in plain black but I paint / build / restore motorcycles for a living so couldn't resist the temptation to give the old girl a bit of a lift.

I've been ridiculously busy over the last 6-8 weeks getting bikes ready for 'the season' but finally today I managed to roll my 11 up on the ramp and make a start.

In addition to the paintwork I have just bought a Lazer decat section from evilbay, a bunch of new black stainless fixing hardware, new grips, new rear indicators, a seat cowl and a few other bits n pieces.

I will have the seat re-trimmed to match the new paintwork.

Here she is before I started (previous owners photo)
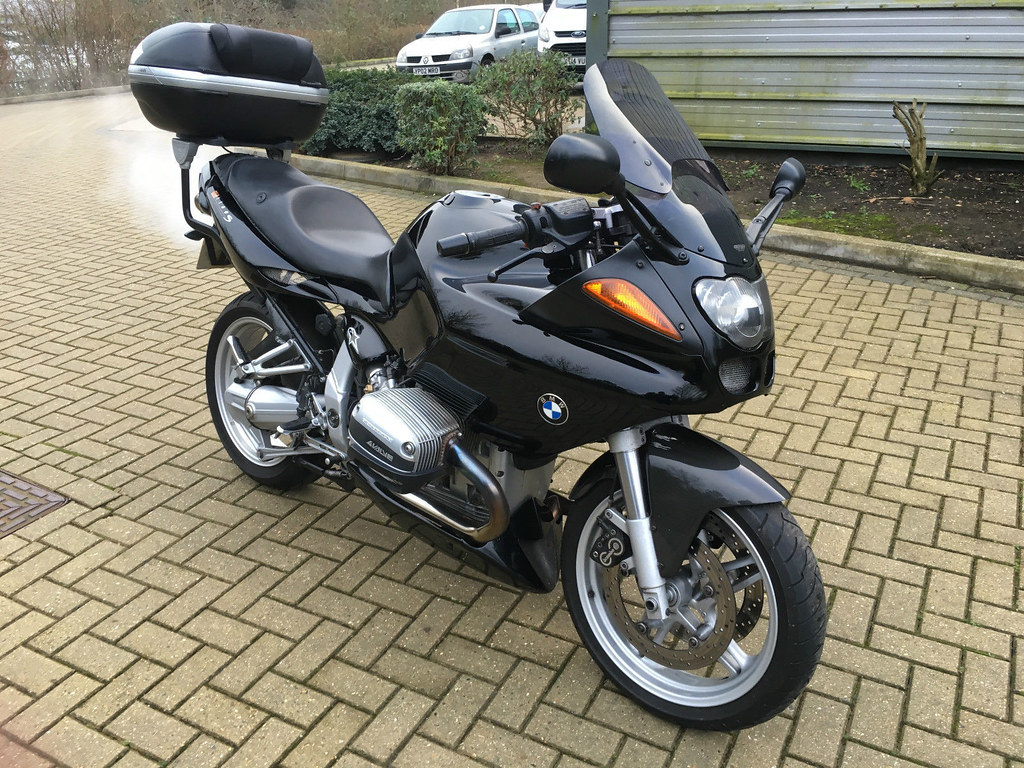
Image$_57 by tunneruk, on Flickr

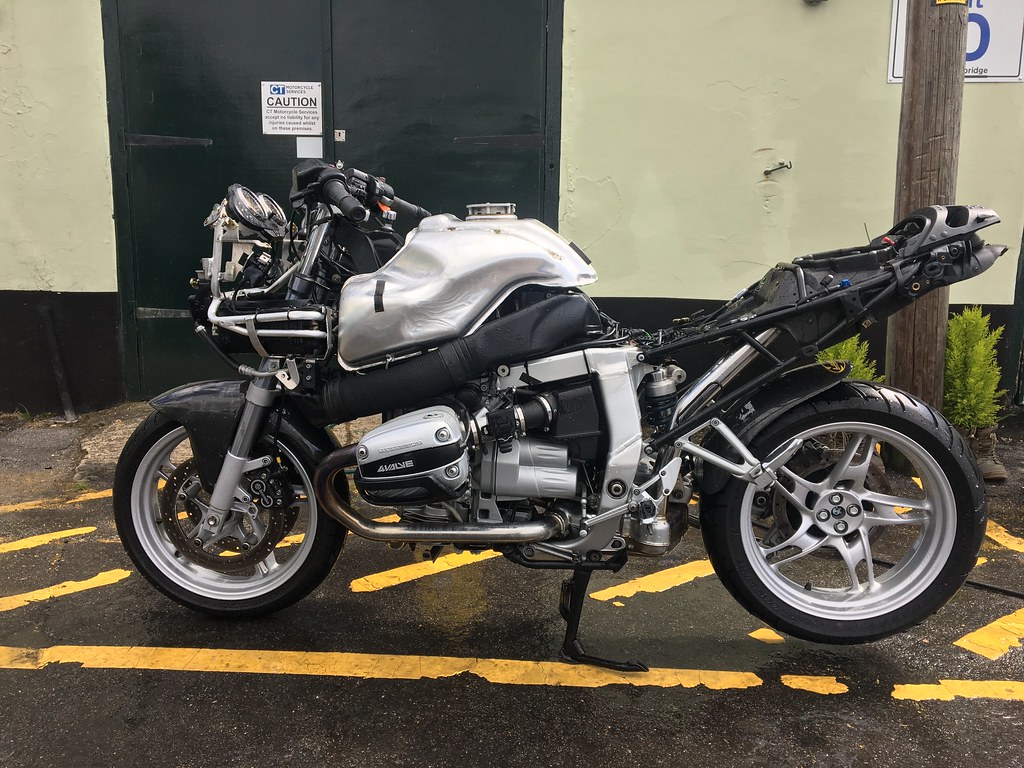
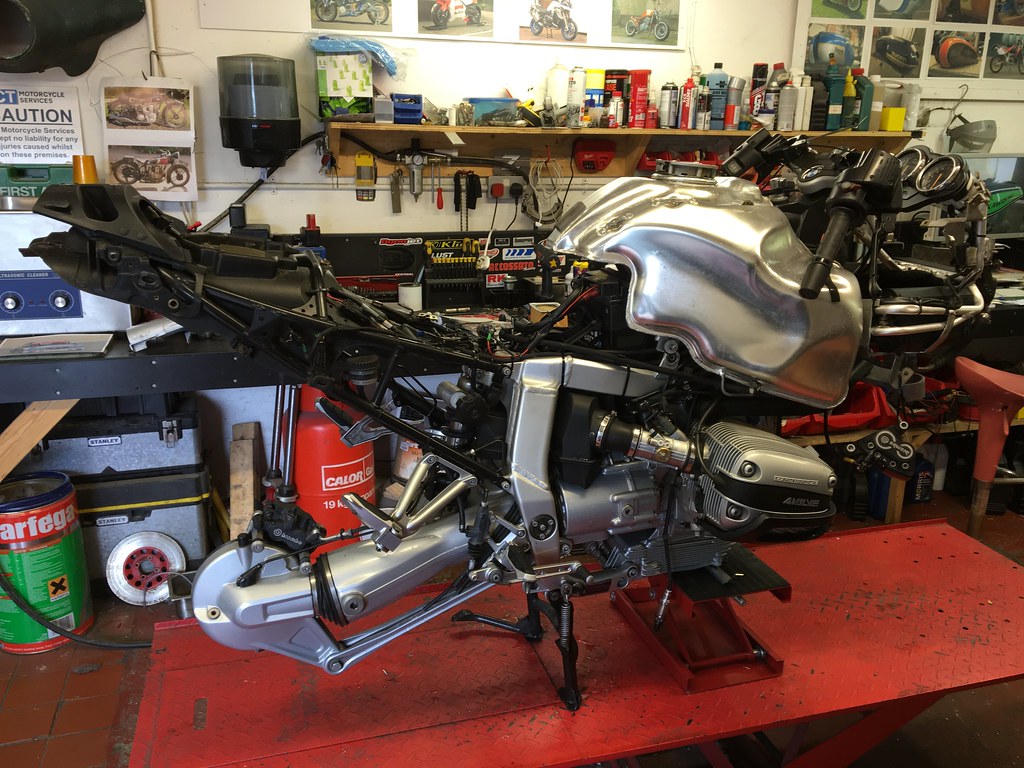
And here she is after today's strip down!
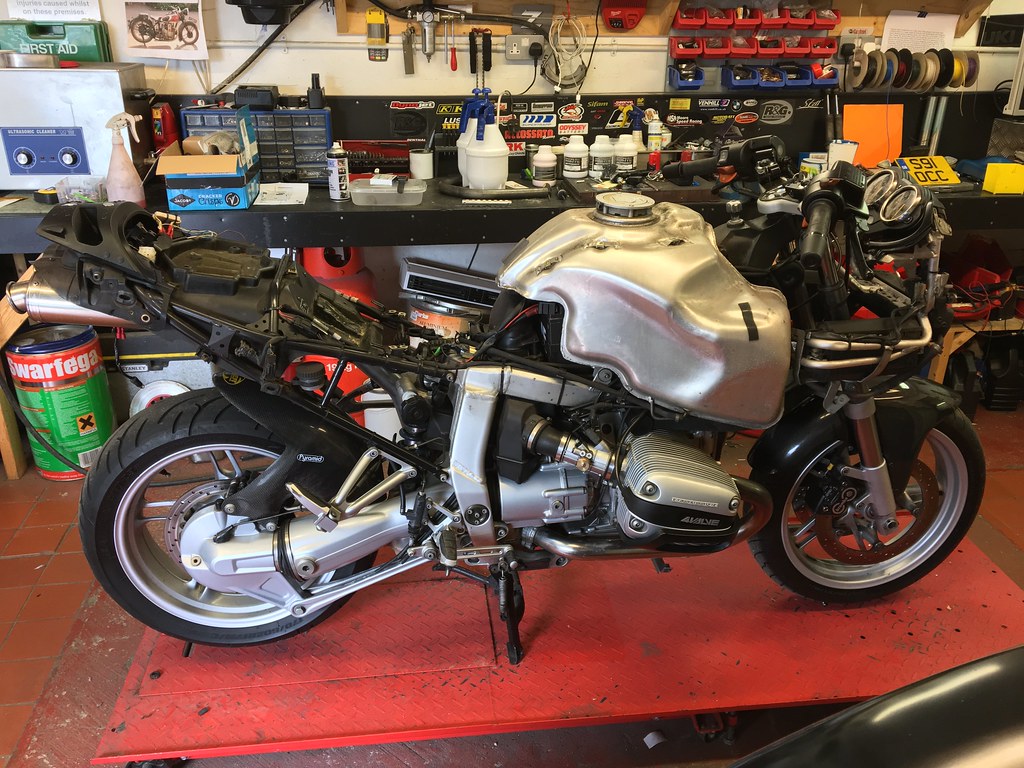
ImageIMG_2062 by tunneruk, on Flickr

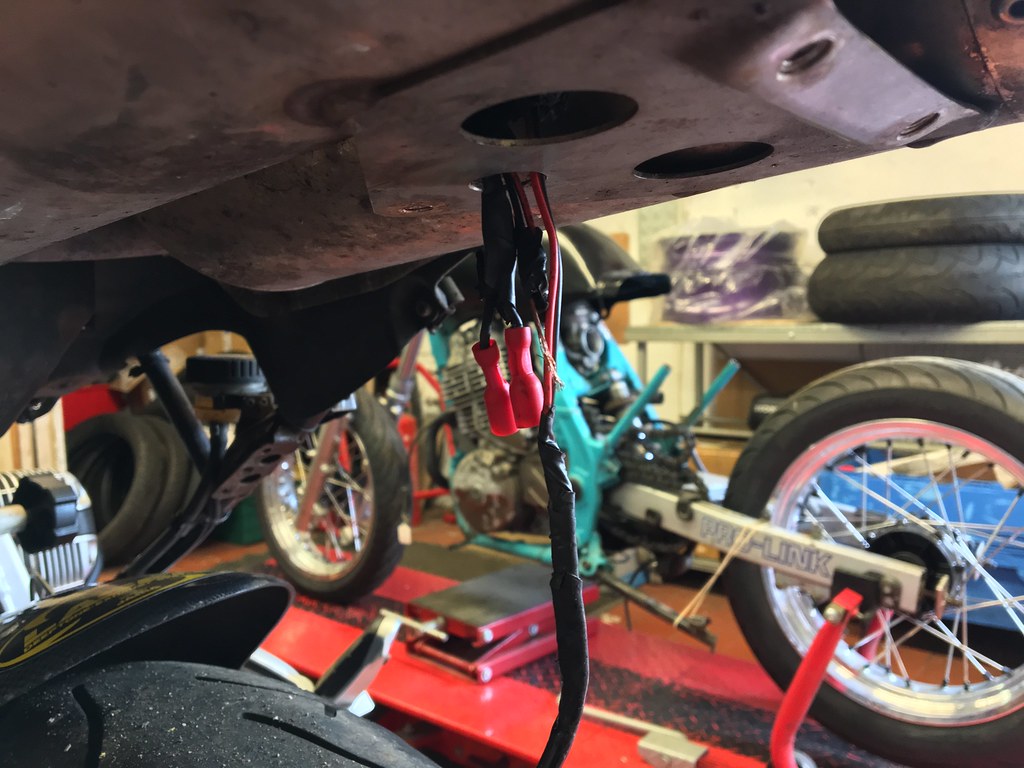
There's a bit of electrical .... err ....tidying to do too ...... :shock: but in fairness it's 99% related to the tail tidy fitment, aside from that it's untouched!
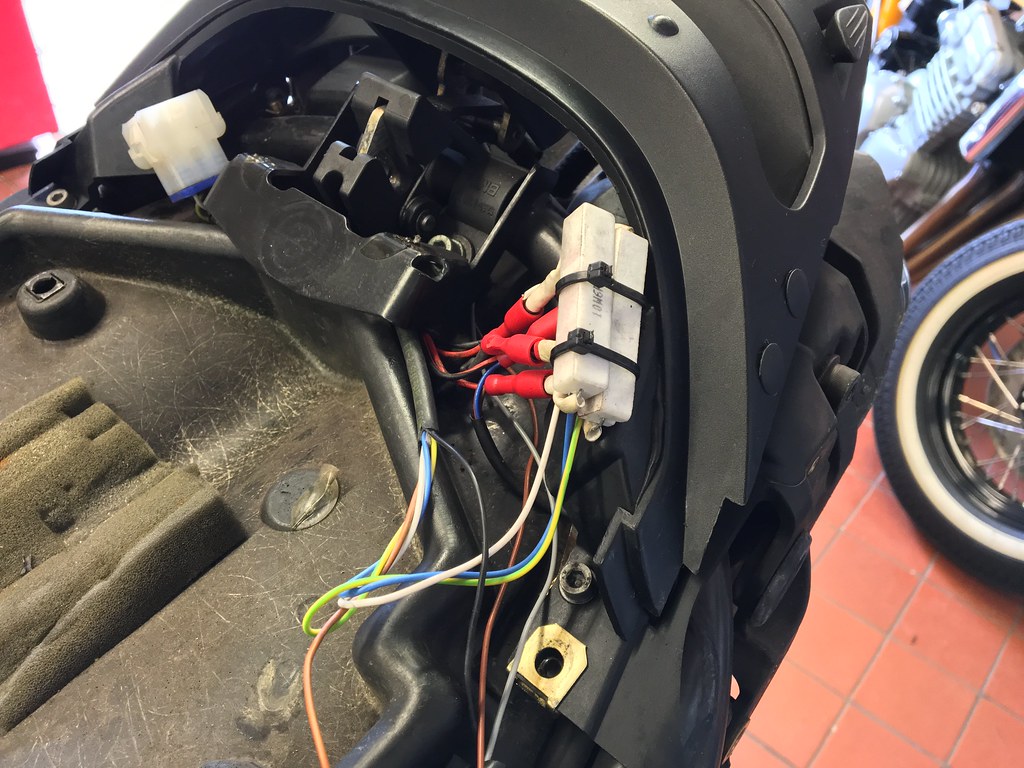
ImageIMG_2064 by tunneruk, on Flickr

ImageIMG_2066 by tunneruk, on Flickr

User avatar
ianbcr
Member
Posts: 1475
Joined: Wed Mar 19, 2008 6:40 pm
Location: Walsall

Postby ianbcr » Mon Jun 20, 2016 10:15 pm

You not painting the front fender then. Mr T uk. :roll:
I am sure it will look great.
Your born with a certain amout of heart beats, Dont waste them on exersise. [smilie=rooster.gif]


04 boxer cup rep. Gone but not forgoten
99 tlr1000 (V twin) tricked.
Indian Roadmaster Elite
Mercedes EQC 400

User avatar
Tunneruk
Posts: 38
Joined: Sun May 17, 2015 10:09 am
Location: Maidstone
Contact:

Postby Tunneruk » Mon Jun 20, 2016 10:20 pm

ianbcr wrote:You not painting the front fender then. Mr T uk. :roll:
I am sure it will look great.


No fella, leaving the front mudguard and hugger in carbon.

User avatar
Tunneruk
Posts: 38
Joined: Sun May 17, 2015 10:09 am
Location: Maidstone
Contact:

Postby Tunneruk » Tue Jun 21, 2016 10:29 am

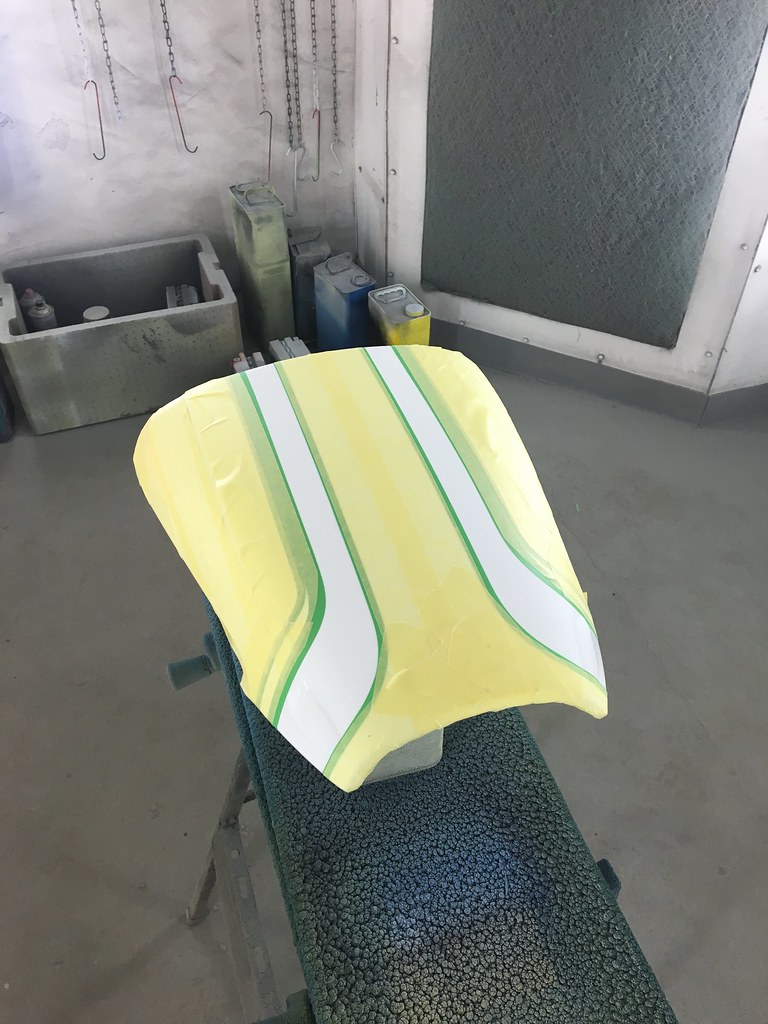
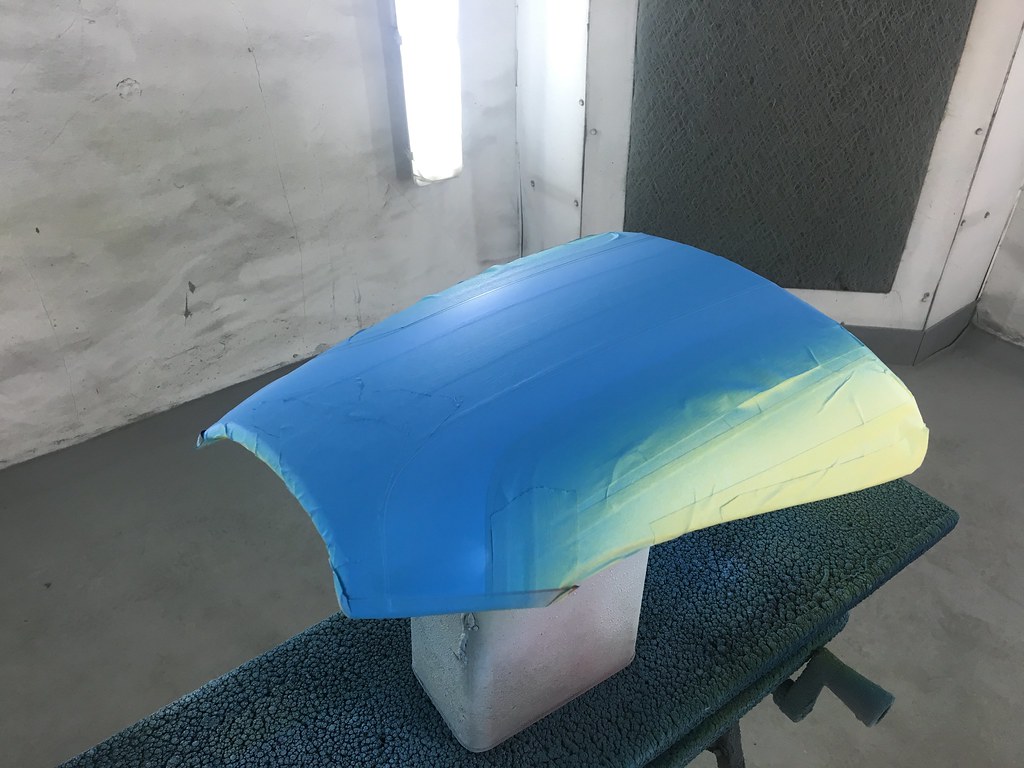
I have made a little progress today.

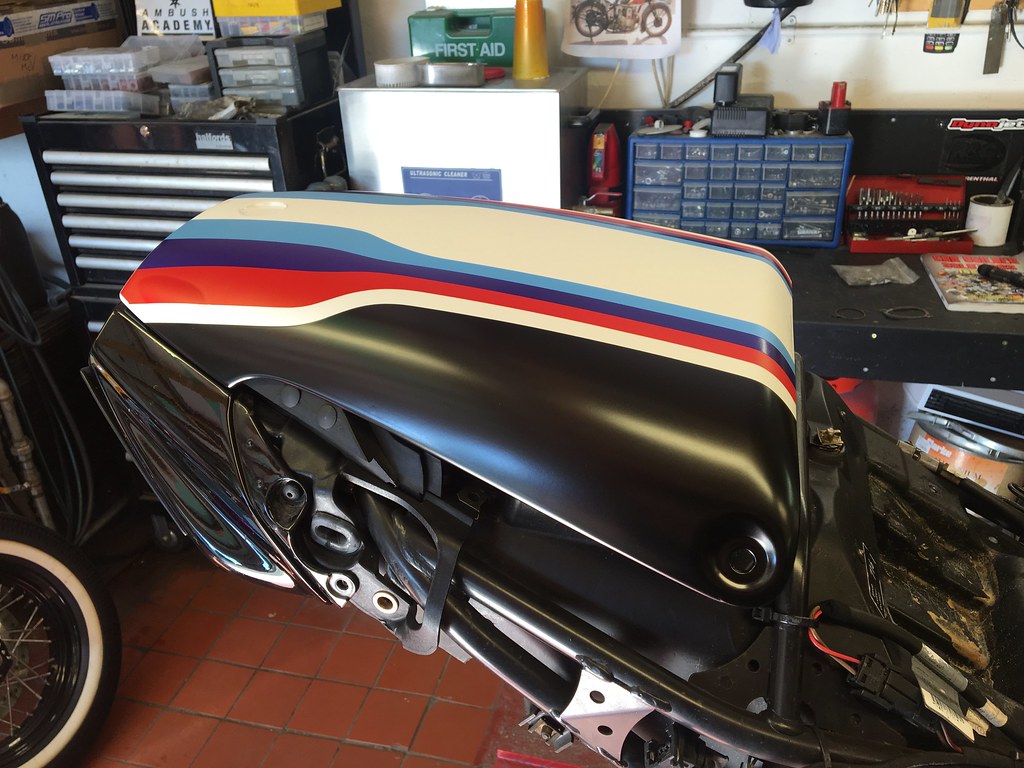
I'm trying out some paint from a new supplier and adding a few extra ingredients to lift it a little. On that basis I have decided to paint the seat cowl in it's entirety before I move on to the rest of the bike. If I don't like it or the colours don't work out then I can just paint over it. I will warn those that are salivating over the prospect of a full on custom job that I'm going to be playing this one family safe. It's an R1100S and I'm going to paint it in a manner fitting with that ilk of bike using a scheme that I've used before. So, they'll be no crazy candy greens or flipped out pearl oranges.

That said, it should look pretty cool though!

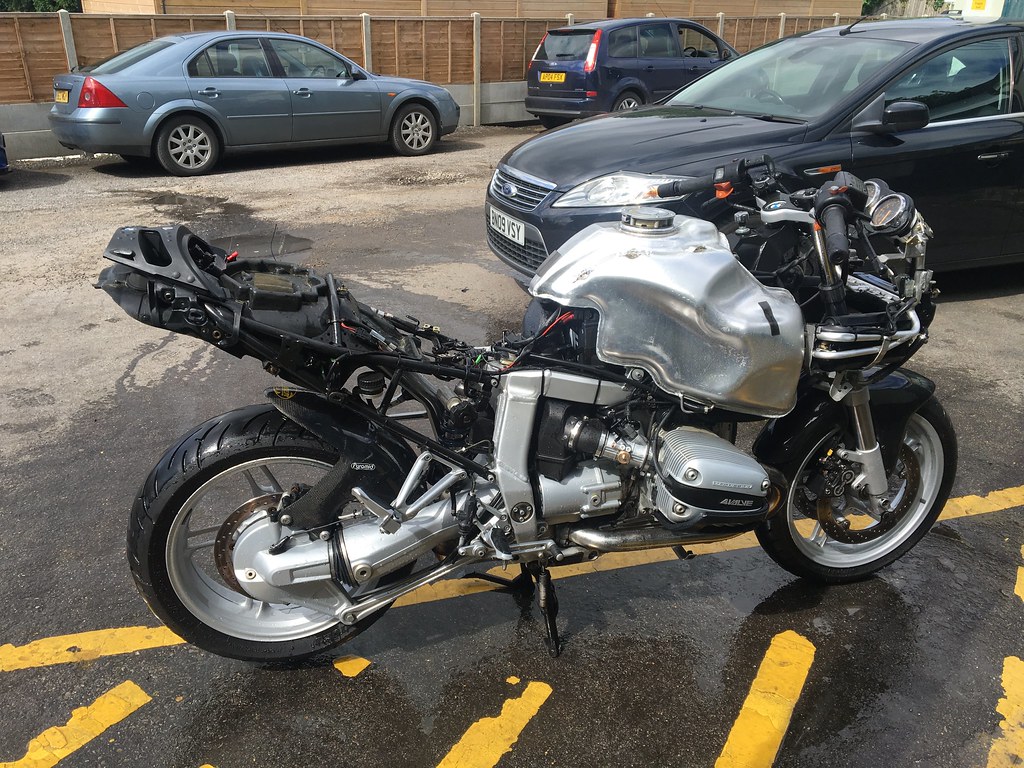
I've made a start on the seat cowl this morning, in between coats I wheeled the naked bike outside for a good old scrub down ;)

ImageIMG_2080 by tunneruk, on Flickr

ImageIMG_2077 by tunneruk, on Flickr

ImageIMG_2076 by tunneruk, on Flickr

ImageIMG_2075 by tunneruk, on Flickr

User avatar
Tunneruk
Posts: 38
Joined: Sun May 17, 2015 10:09 am
Location: Maidstone
Contact:

Postby Tunneruk » Wed Jun 22, 2016 6:39 pm

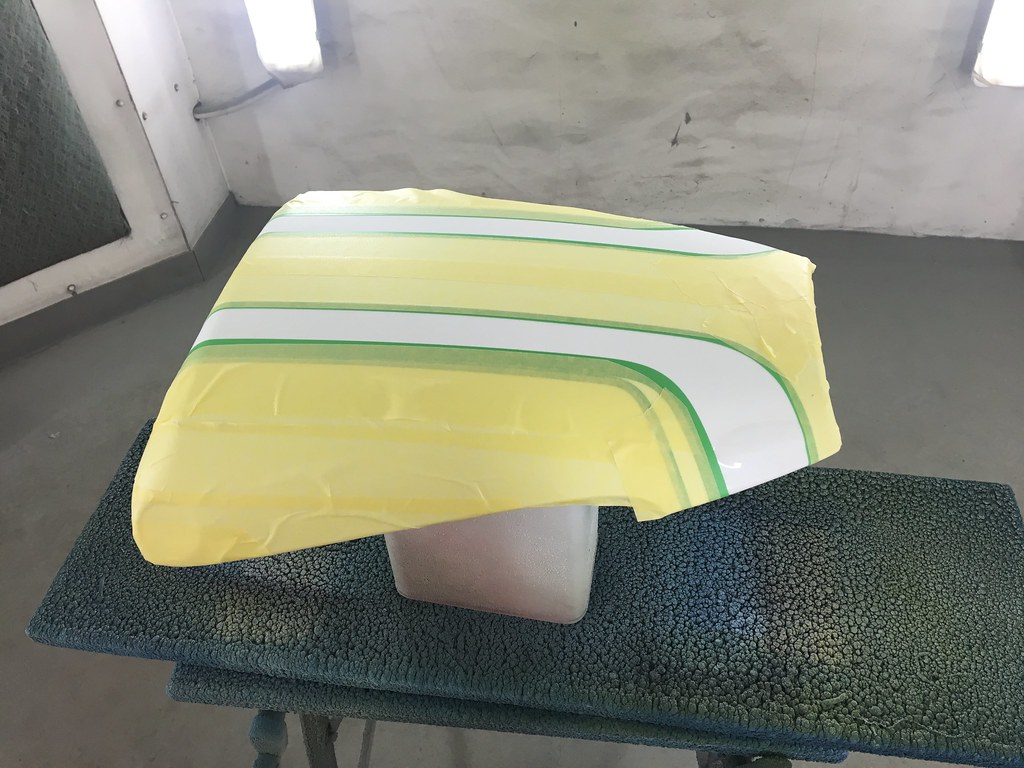
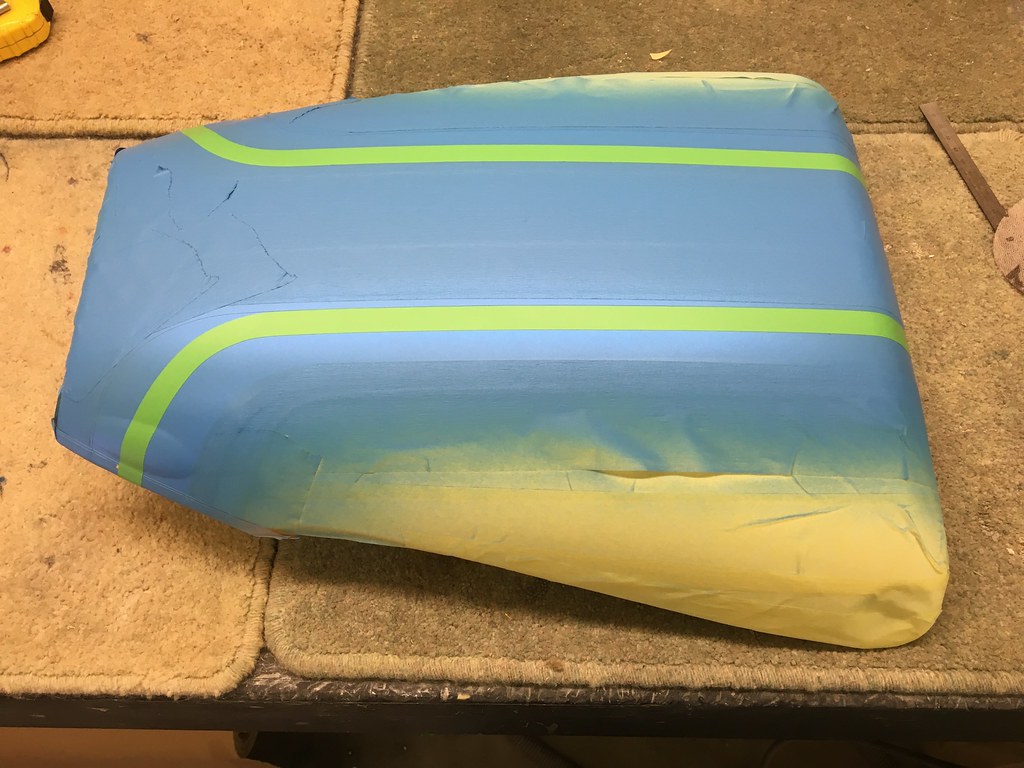
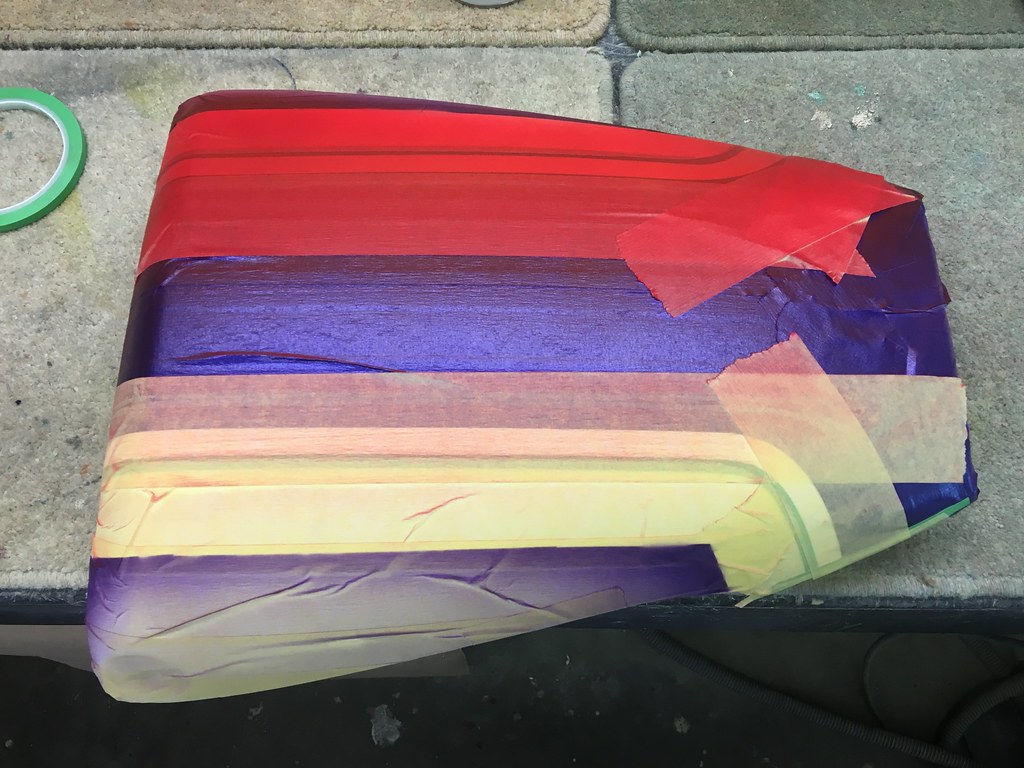
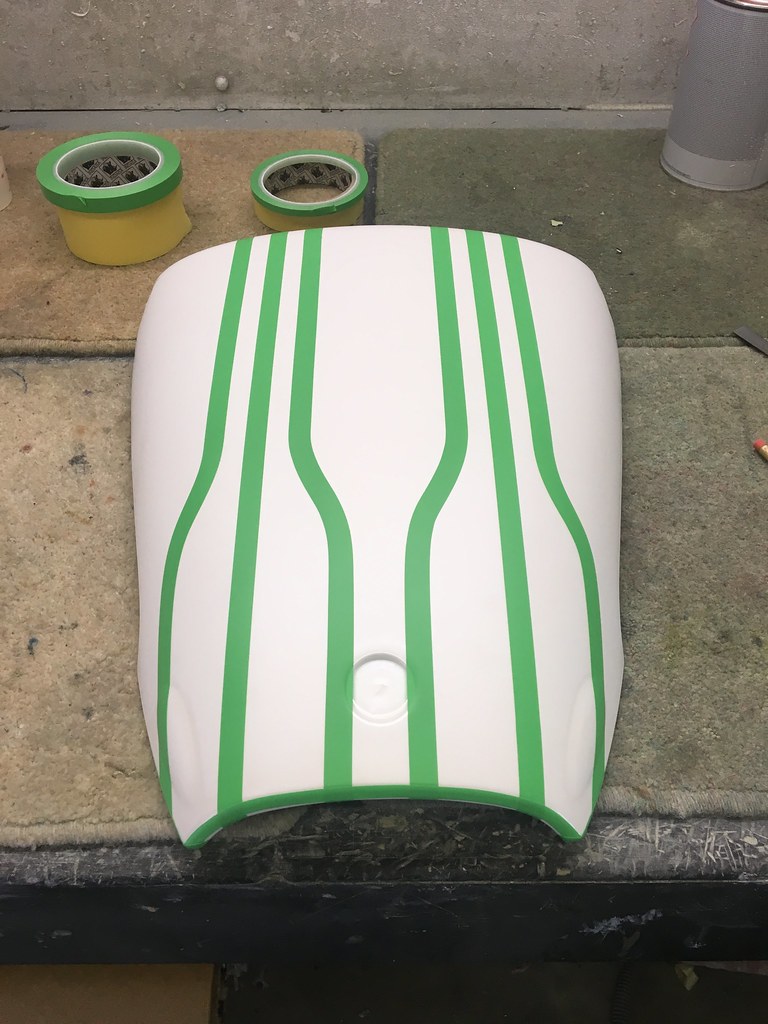
Well it's like this, I did finish the seat cowl yesterday but sadly I'm not happy with the colour effects so I rubbed it down this morning and started again, I've had a bit of running around to do today so only managed to get it's white, pearl and xiralic clear coats on, I'll mask it up and lay the colours on tomorrow. Hopefully this time I'll be happy with the result!

ImageIMG_2081 by tunneruk, on Flickr

ImageIMG_2082 by tunneruk, on Flickr

ImageIMG_2083 by tunneruk, on Flickr

ImageIMG_2084 by tunneruk, on Flickr

User avatar
Blackal
Posts: 8261
Joined: Fri Jul 29, 2005 7:53 pm

Postby Blackal » Wed Jun 22, 2016 7:15 pm

I'm looking forward to seeing the final result. It aint just the paint finish - tons of good painters around - the real art - is having the vision.

This is going to be good! :D
If I am ever on life support - Unplug me......
Then plug me back in..........

See if that works .....
:?

victorlaszlo
Posts: 304
Joined: Sat Mar 26, 2016 1:48 pm
Location: London

Postby victorlaszlo » Wed Jun 22, 2016 8:01 pm

I'm definitely going to speak to you when I decide doing the black stripes on my silver-grey R1200S :D

bfisher
Posts: 224
Joined: Mon Jan 12, 2015 10:37 pm
Location: SW London

Postby bfisher » Wed Jun 22, 2016 8:50 pm

And there i was thinking i would be waiting for a few months for you to clear your backlog!! I am looking fwd to this..

PS - i did similar (without the painting), namely power coat rear sub-frame, bar-ends, centre stand & a few other bits including battery case (i know it will only be me that knows that its shiny & black underneath but hey the rust annoyed me) etc via http://tpcs-magnesium-refurbs.co.uk/ I am sure you have your contacts if you can't do it yourself BUT he did a brillant job & good price..

Brad

User avatar
Tunneruk
Posts: 38
Joined: Sun May 17, 2015 10:09 am
Location: Maidstone
Contact:

Postby Tunneruk » Thu Jun 23, 2016 1:55 pm

As usual I've gone further than I was planning, it's a question of "Just doing that bit so I might as well do that bit .... and that bit"

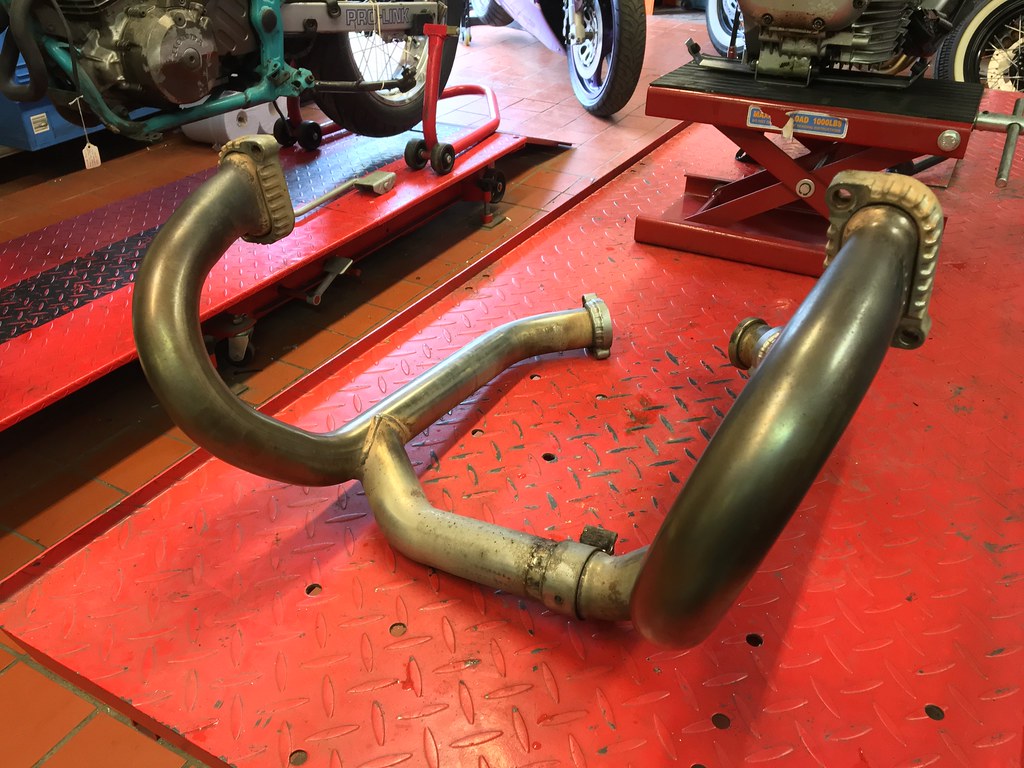
I've bought a Laser decay Y piece which I will clean up before fitting, this of course will make the headers look dull so I've removed them too. In turn this has revealed the classic rusty exhaust studs which I'll address before I refit the headers.

I'm awaiting a chemical cleaner from Germany to bring the Stainless back up to spec.

I will paint the fork bottoms and bottom yoke seeing as they're out of the bike too ......

I've gone as far back with the bike as I'm going to, if I take anything else off it I might as well do a full bloody resto!

Time for a wash up and some paintwork I reckon!

ImageIMG_2100 by tunneruk, on Flickr

ImageIMG_2098 by tunneruk, on Flickr

ImageIMG_2096 by tunneruk, on Flickr

ImageIMG_2089 by tunneruk, on Flickr

User avatar
Tunneruk
Posts: 38
Joined: Sun May 17, 2015 10:09 am
Location: Maidstone
Contact:

Postby Tunneruk » Thu Jun 23, 2016 3:59 pm

Well that was an interesting couple of hours!

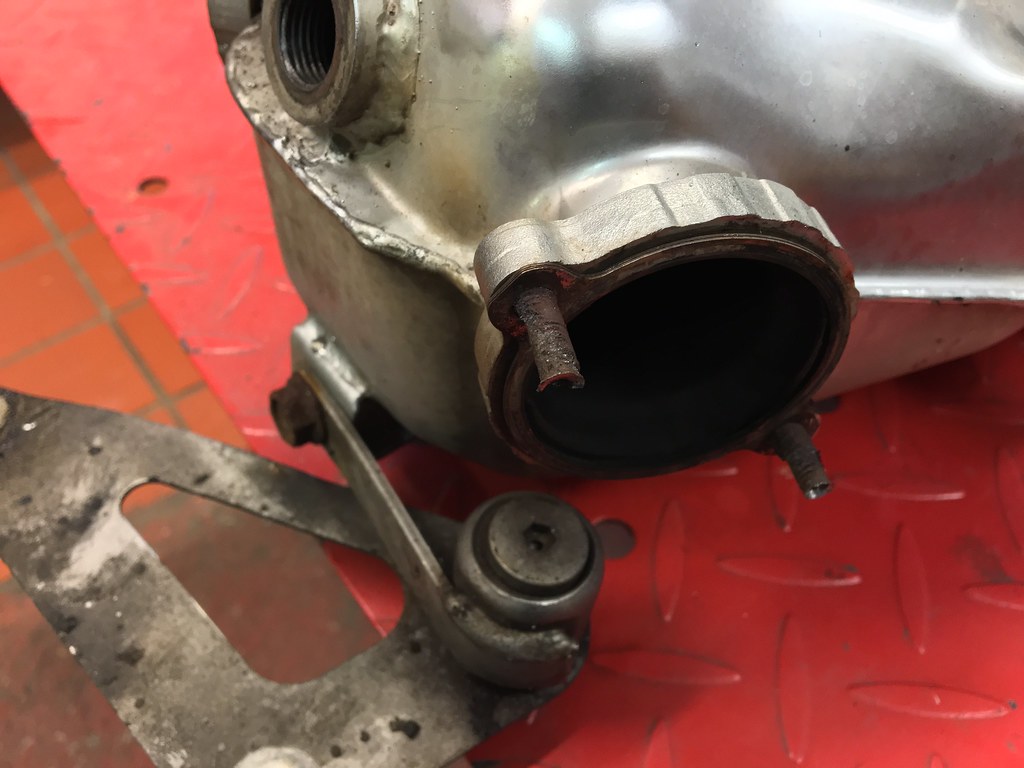
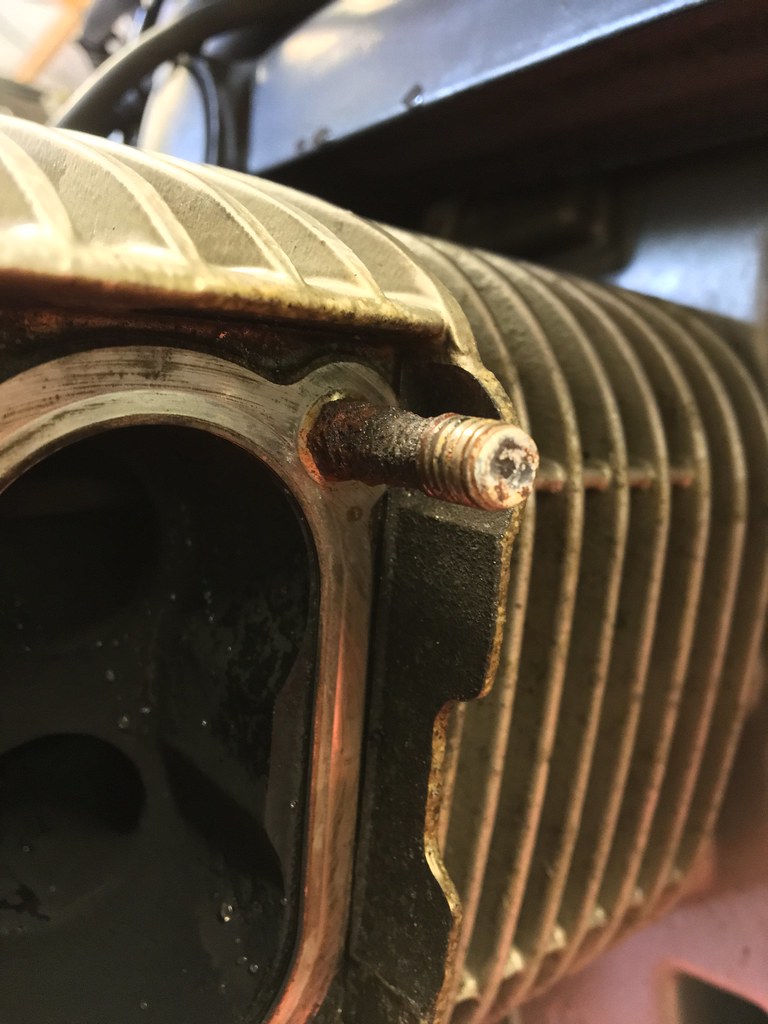
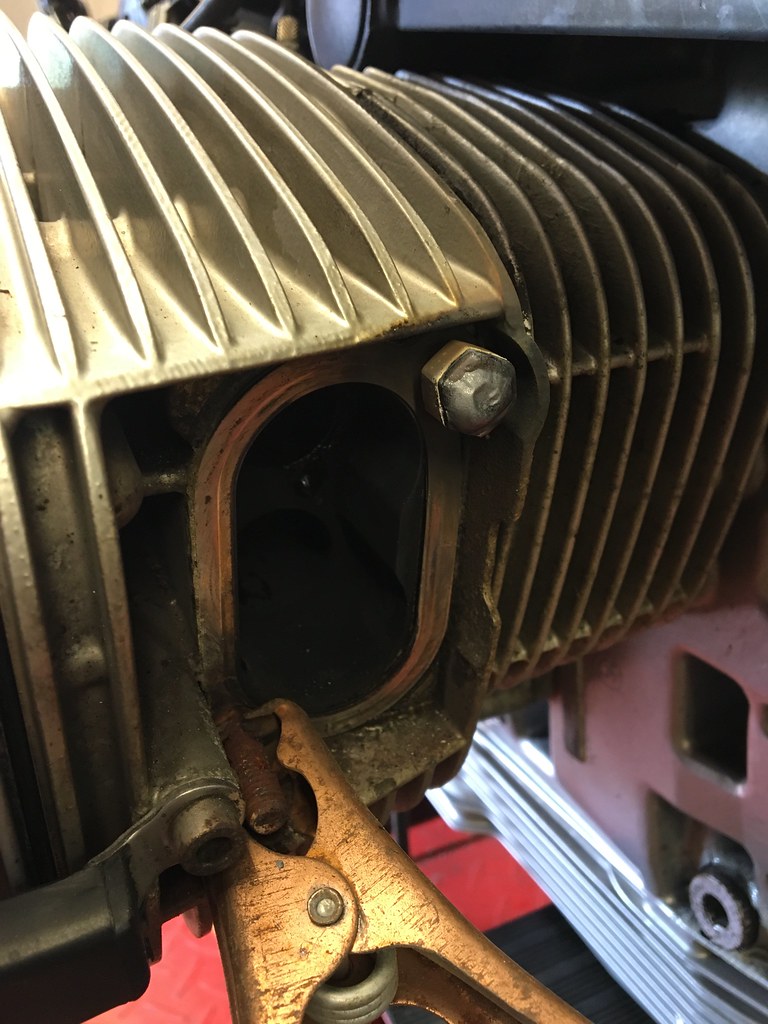
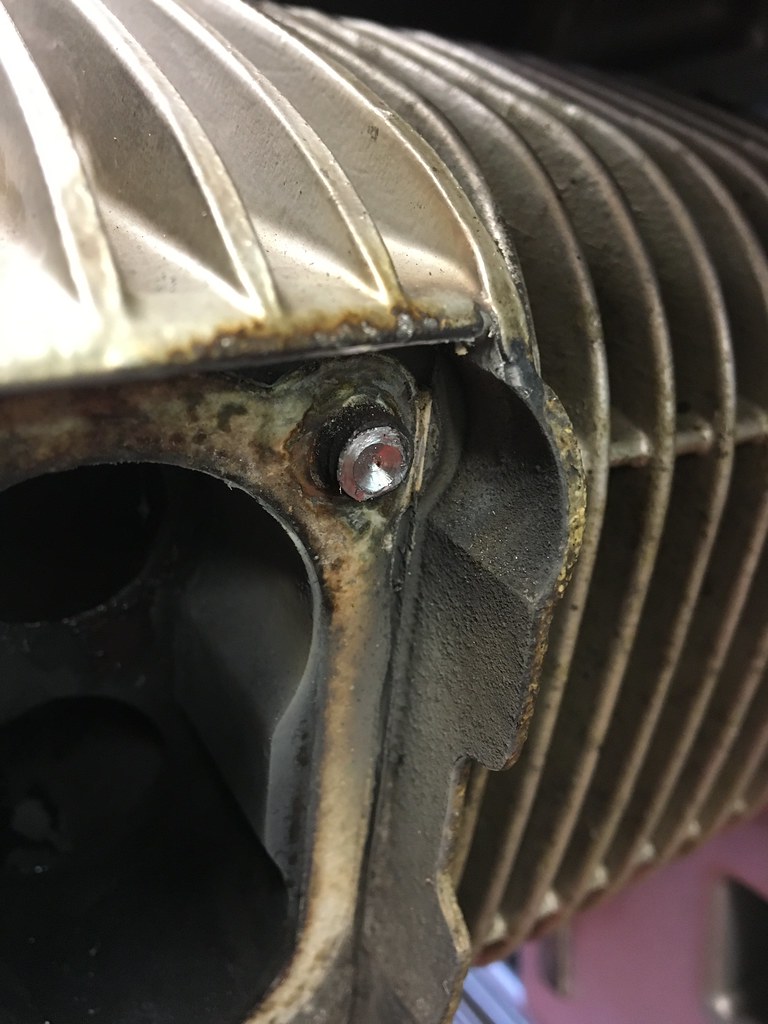
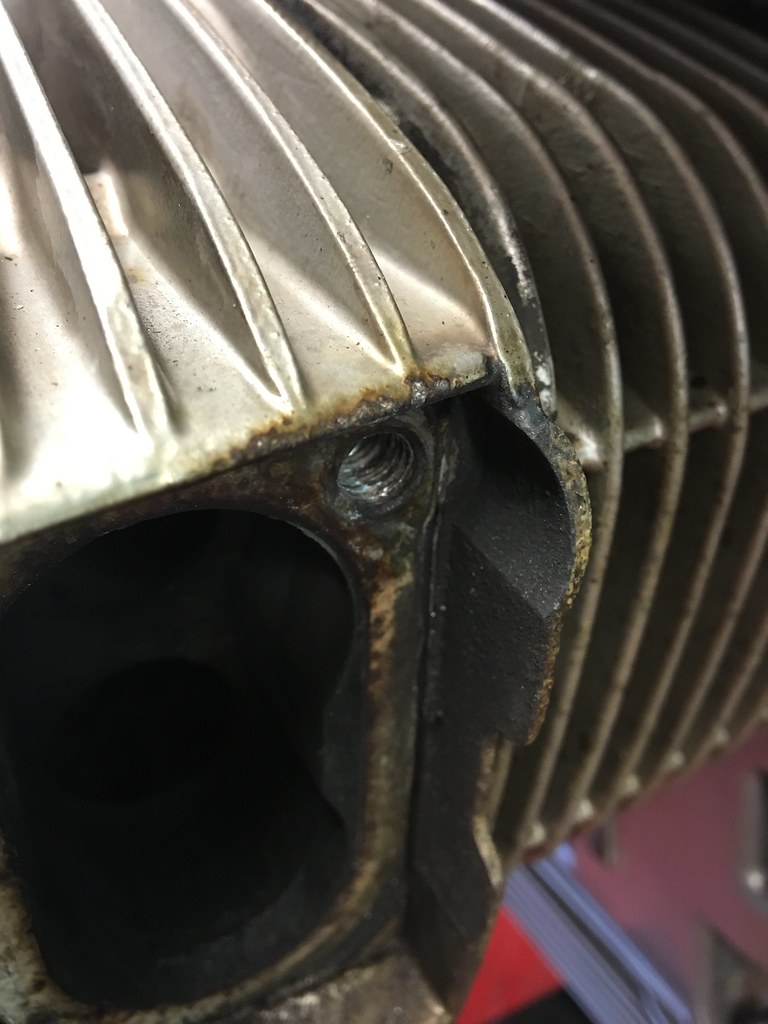
The mission - To extract the rotted exhaust stud.

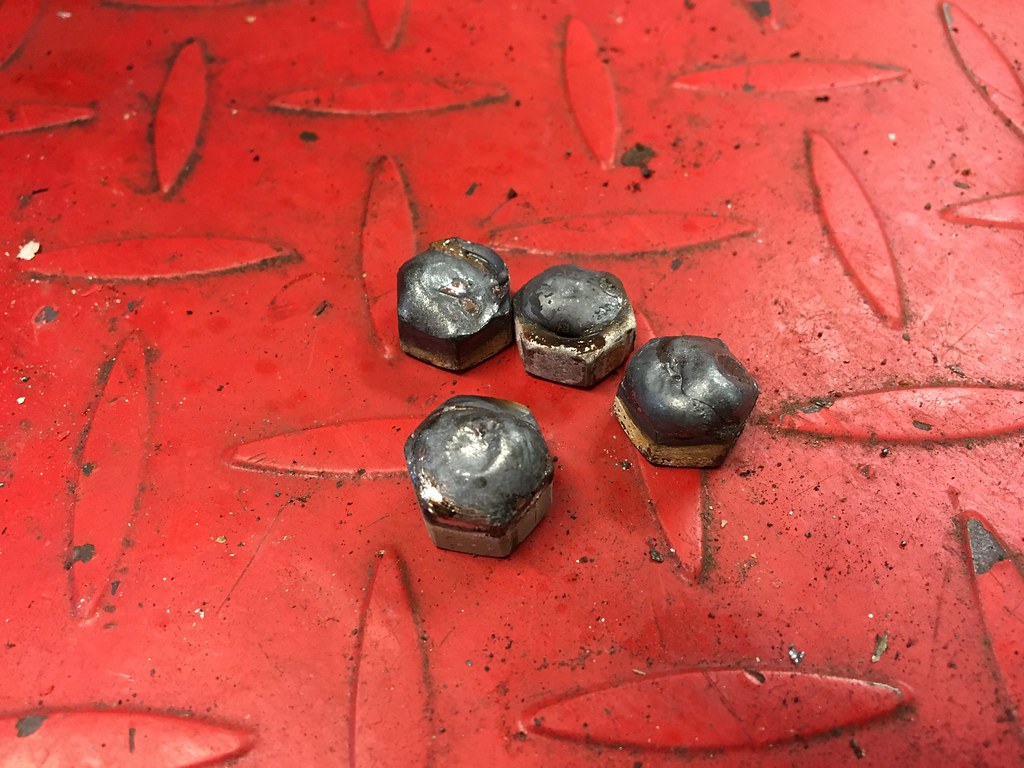
I started with a bit of heat and the old 'double nut' trick ...... No chance, the stud just snapped.

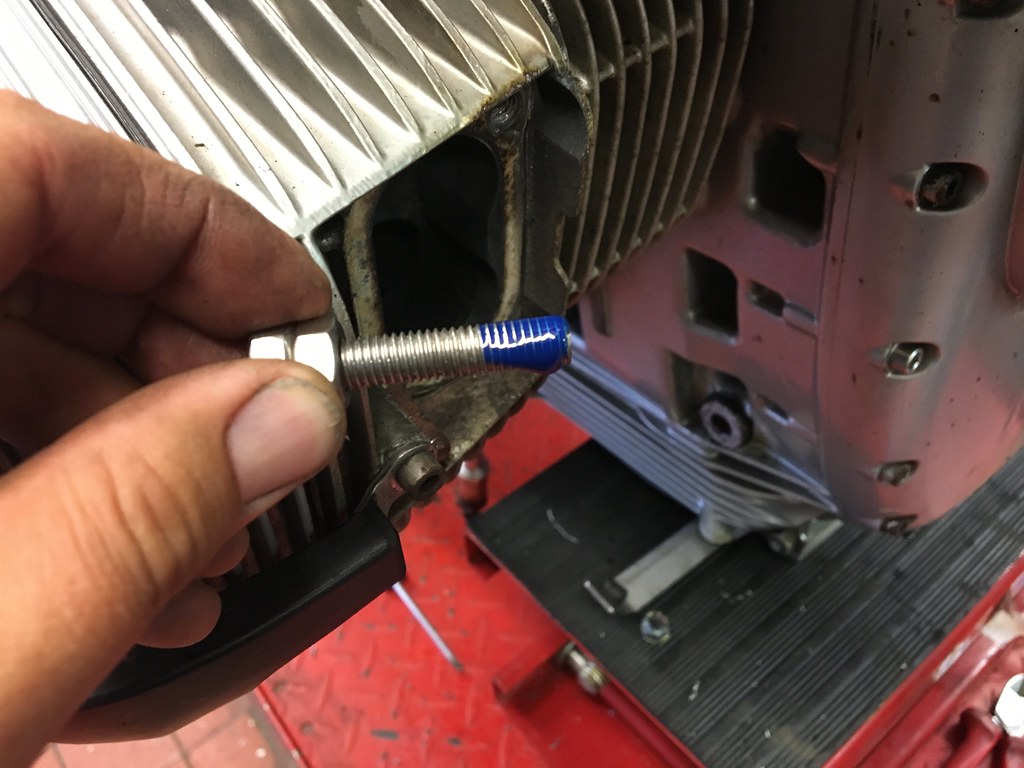
However, there was still 15mm of thread showing so I would another nut on and welded it on, the hope being that the heat transferred would help release the thread, each time I just managed to snap a bit more stud off .... five times in fact :D

ImageIMG_2101 by tunneruk, on Flickr

ImageIMG_2102 by tunneruk, on Flickr

So, undeterred, I went back to basics and got stuck in -

ImageIMG_2103 by tunneruk, on Flickr

ImageIMG_2104 by tunneruk, on Flickr

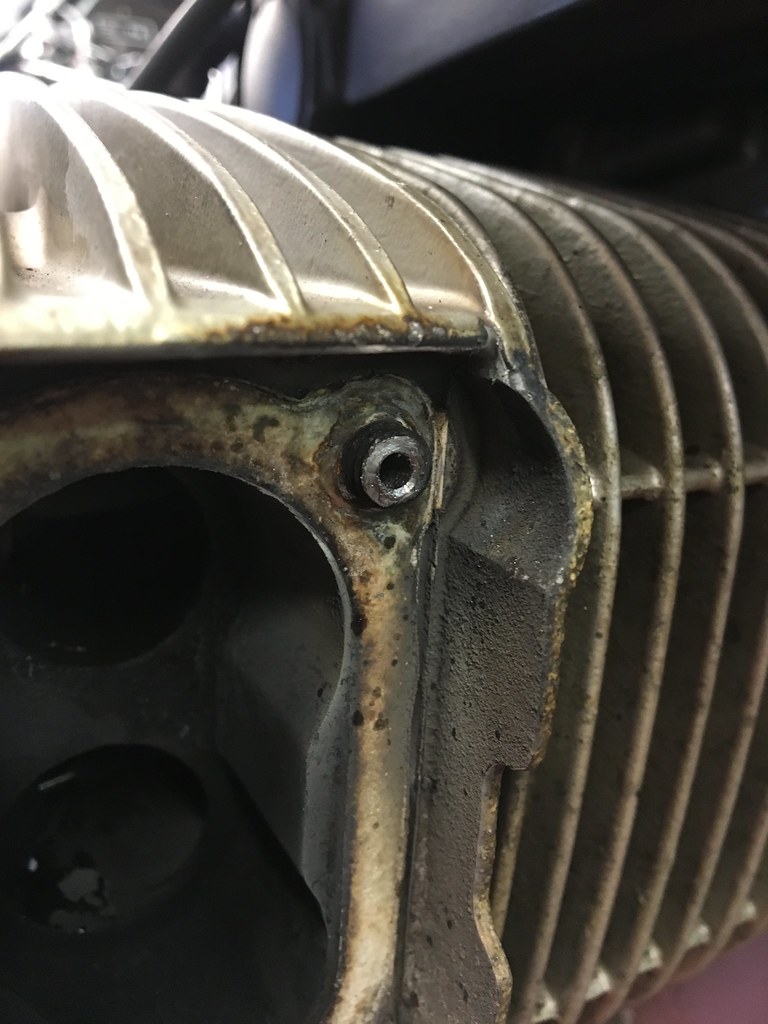
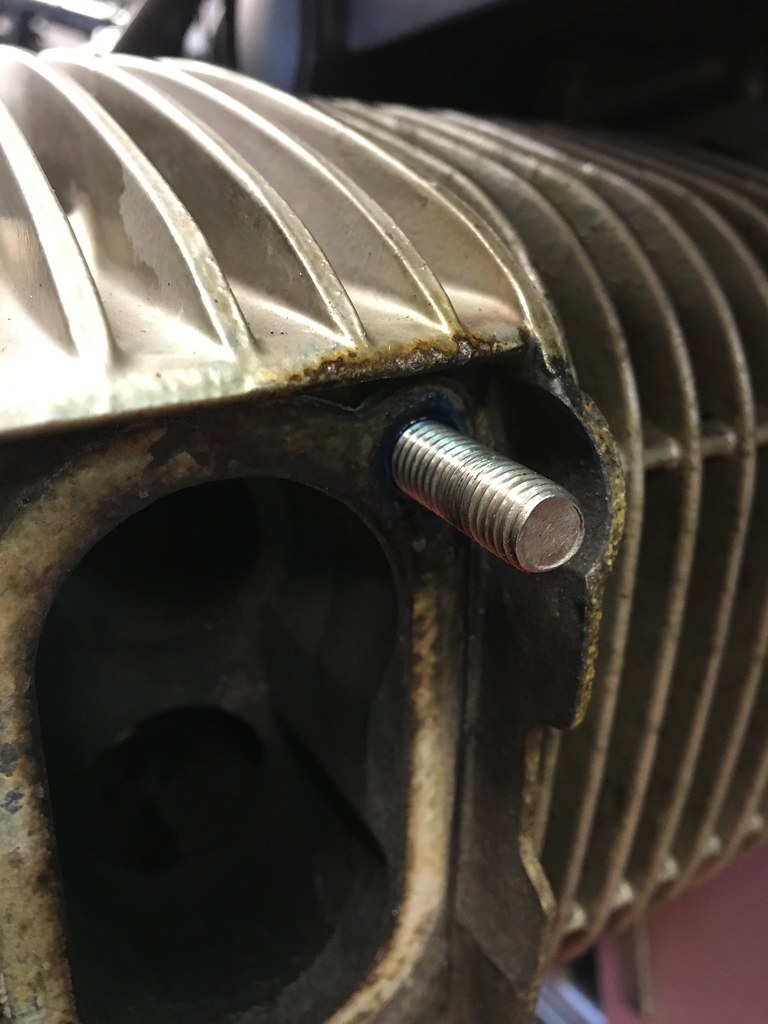
I was very lucky in that I managed to drill out the old stud and just leave a coil of thread which came out like a spring. I ran a top down the hole and wound in the new stud!

ImageIMG_2105 by tunneruk, on Flickr

ImageIMG_2107 by tunneruk, on Flickr

ImageIMG_2109 by tunneruk, on Flickr

The result of this is that I've got naff all painting done today!

victorlaszlo
Posts: 304
Joined: Sat Mar 26, 2016 1:48 pm
Location: London

Postby victorlaszlo » Thu Jun 23, 2016 5:17 pm

Hate that happening. At least you have stainless now that will create galvanic corrosion on top of the loctite ie really stick in there and not come out with the nut in the future :)

On mine it was a nightmare getting the studs out of my stainless Remus X-pipe but fortunately at the cylinders they werent stuck :)

dave the german
Member
Posts: 3625
Joined: Tue Nov 01, 2005 4:35 am
Location: North East

Postby dave the german » Fri Jun 24, 2016 3:40 am

What was the chemical cleaner? Was it Anti blau? I used it on the headers on my 12s but got better results with a fine copper wire brush or proper polishing compound - try the polishing shop - give them a ring they're really helpful
'15 R1200GS TE
'06 R1200S
'04 BCR
Yam SR 500 long term restoration
wanna win the lottery and ride my bike

User avatar
Tunneruk
Posts: 38
Joined: Sun May 17, 2015 10:09 am
Location: Maidstone
Contact:

Postby Tunneruk » Fri Jun 24, 2016 6:29 am

dave the german wrote:What was the chemical cleaner? Was it Anti blau? I used it on the headers on my 12s but got better results with a fine copper wire brush or proper polishing compound - try the polishing shop - give them a ring they're really helpful


I bought a bottle of OptiGlanz from Germany, of all the products I researched it seemed to have the best reputation. However it hasn't arrived yet so the proof of the pudding will be in the eating :wink:

Of course, I'll write up how I get on with it!

roadburner
Posts: 190
Joined: Mon May 18, 2015 4:02 pm
Location: Cumbria England

Postby roadburner » Fri Jun 24, 2016 12:50 pm

I've used optiglanz. And it is utterly stunning stuff. Literally spray on wash of. Gets rid of blueing and all sorts. I would warn that it's evil stuff and even wearing surgical gloves I managed to get a mild burning sensation.

User avatar
Tunneruk
Posts: 38
Joined: Sun May 17, 2015 10:09 am
Location: Maidstone
Contact:

Postby Tunneruk » Fri Jun 24, 2016 6:20 pm

Today I have been mostly painting (amongst other things)

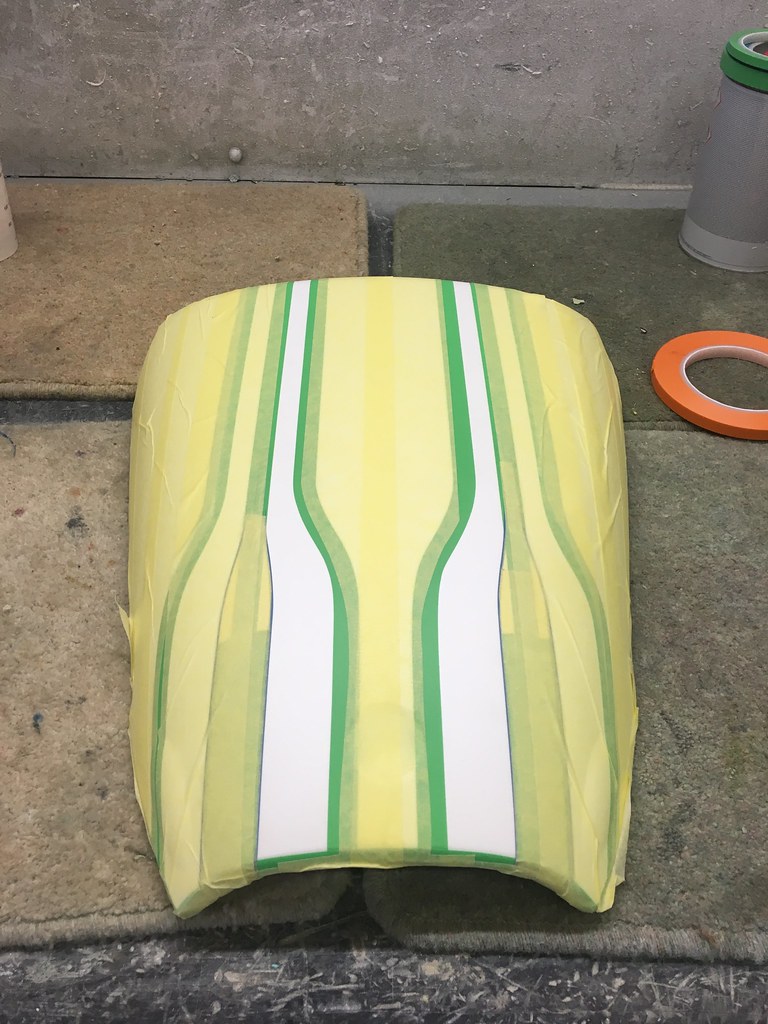
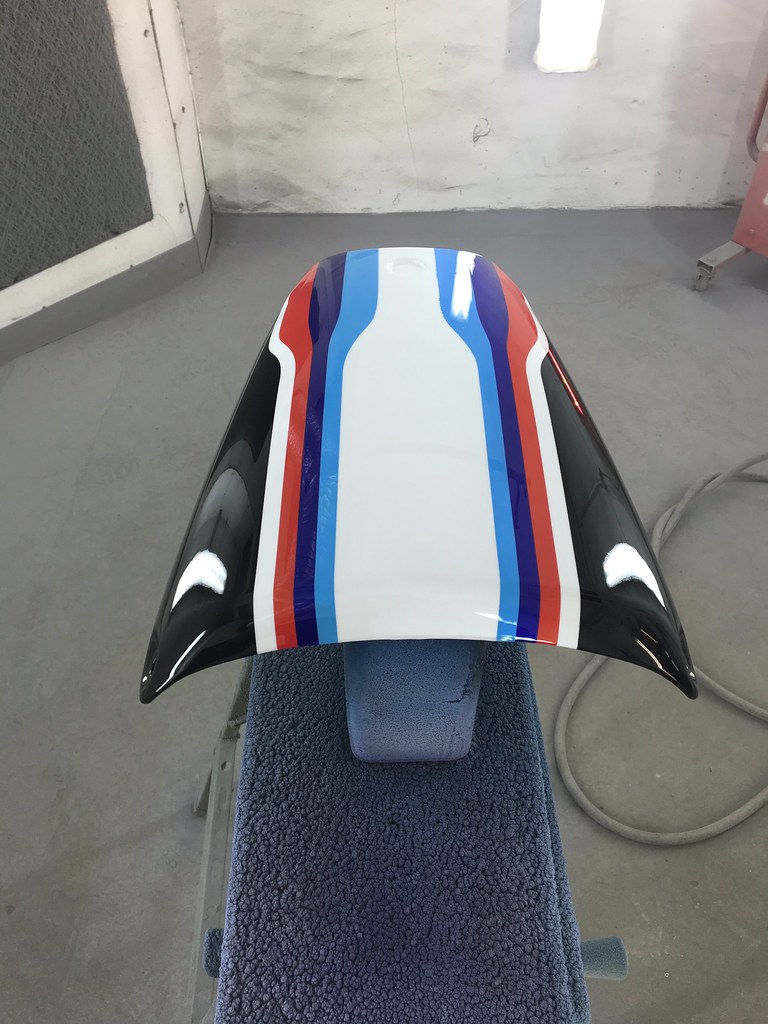
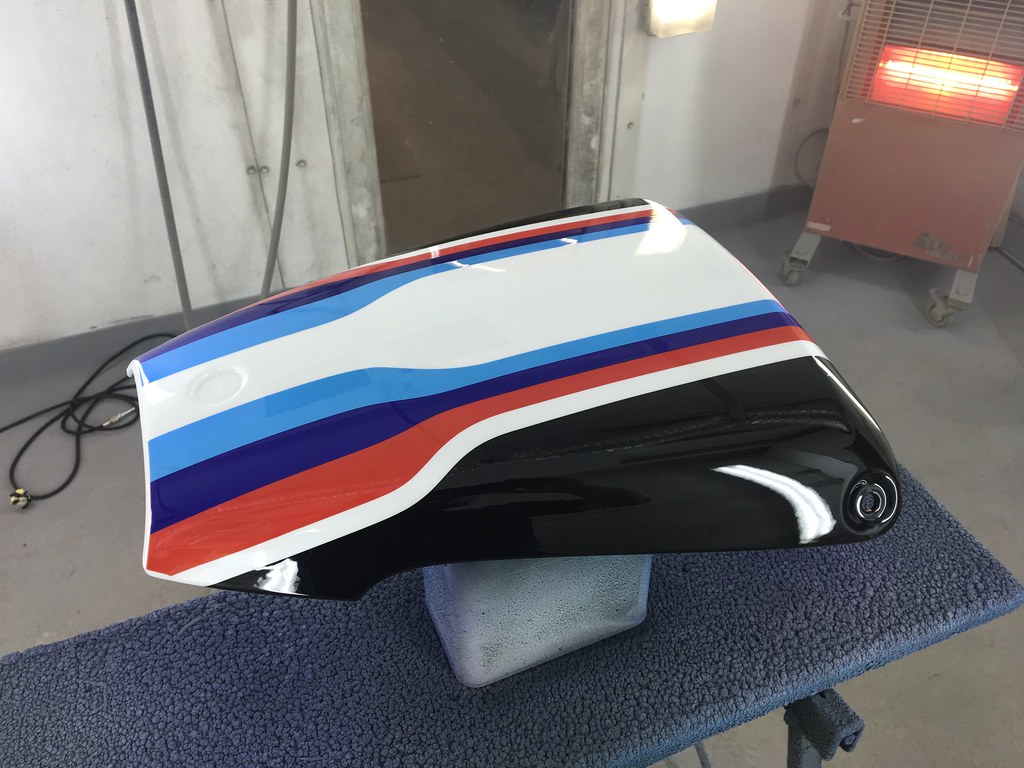
I wasn't sure about the scheme as I was laying it out but I'm really pleased with the final result. There are no less than 10 paint processes involved.

The colours are low locked in with two coats of HS clear. I will flat them back tomorrow and give it another three tomorrow to level out any level changes between the colours.

ImageIMG_2112 by tunneruk, on Flickr

ImageIMG_2113 by tunneruk, on Flickr

ImageIMG_2116 by tunneruk, on Flickr

ImageIMG_2118 (1) by tunneruk, on Flickr

ImageIMG_2120 (1) by tunneruk, on Flickr

ImageIMG_2122 by tunneruk, on Flickr

ImageIMG_2124 by tunneruk, on Flickr


There's a video of the metallic in the paint here too, I wanted to embed it but I can't seem to be able to make it work?


https://youtu.be/MCFzVlhKF10


Return to “Boxerspex”

Who is online

Users browsing this forum: No registered users and 48 guests